this is the card
so here are the dies I used....
and this is the required amount of die cuts
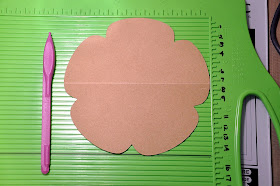
the largest die shape is achieved by drawing round the largest of the Petunia trellis shaped dies...on the outside to give an extra 2cm boarder....I cut this out on my scan and cut...there are copyright issues and designs must never be saved into the machine...only cut out as you would with scissors.
the next stage is to make the easel card buy scoring the base cards
1.5 cm to form a hinge...on the base card
1.5cm and 7.5cm to form the fold for the easel ....then glue on on top of the other at the hinge....
I use a very strong wet glue....whilst you are waiting for that to set start assembling the front of the card
making sure that the glue is only on the bottom half....and line it all up
then stick the centre panel on...I have done mine flat but you can always add extra dimension by using foam pads to lift the centre section up
now to line the inside....trim the white layer to fit....
now fit the easel stopper I used the happy birthday sentiment
goodness I wonder if you are still with me .....its time to decorate with any flourishes leaves and flowers you choose...I used spellbinder spiral blossoms and Marriane design leaves....
so the finished card
the centres of the flowers are filled with clear micro beads.
How did I do?


Great! you did just great Margaret, thanks for a fab tutorial showing the creation of this beautiful easel card.
ReplyDeleteLorraine
WOW! This is just sooooo stunning, Margaret. Thanks for the tutorial.
ReplyDeletexxx Asha
A stunning card Margaret and great tutorial. Carol x
ReplyDeleteHi Margaret what a gorgeous card, your design and dies are beautiful and your tutorial is very clear, well done, especially as it's your first one, hugs Kate x
ReplyDeleteOMG-This is fabulous!!!! Can I say that again? Fabulous!!!:) I love the step by step and it still makes me in awe of your work
ReplyDelete